


As the resident Mustang nerd here at Front Street, I often have conversations regarding performance improvements with friends and coworkers. One such coworker—Mike Hall, Director of Customer Support here at our parent company Turn 14 Distribution—approached me earlier this year to talk power-adders and what I thought would work best on his 2018 Mustang GT, a car he acquired about a year ago. Mike is no stranger to centrifugal superchargers (he previously owned a blown ’97 Cobra) but wasn’t sure which would make the most sense for him to buy for this car. After talking with him in-depth, we started to look into the various kits offered by ProCharger.

I have one on my own 2011 Mustang and am very happy with its performance and fit/finish of the install, so Mike began peppering me with questions about it. We talked through the details of what he was looking for out of the car, how he’d be using it, what his ultimate goals were, and how we could get him there with the different systems they offered.
Once I had him convinced—which I’ll admit didn’t take much, I think he was just looking for validation—I began pestering him to pull the trigger. As I had been involved in an install of one of these systems on a similar car, I knew what it would take to get it installed and have him up and running, so I offered the use of my garage, tools, and camera so that we could document the install for Front Street. He was on board, and a couple of weeks later, the system showed up. He chose to buy the Stage I P1-1SC-1 tuner kit, since he could purchase several of the ancillary items like an nGauge and Injector Dynamics ID1000 injectors from here at work by taking advantage of his employee discount.
We planned a day to do the install, looked through the install manual so that I could figure out whether I’d have to invest in any additional tools—I needed a set of impact hex drivers that I ultimately used for about 30 seconds—then just waited for the day to arrive, so we could get Mike’s boosted life rolling.
I should preface the rest of the article by saying that I am extremely lucky to have a lift in my garage, which made a couple of the areas of this install a bit easier for us. But there wasn’t a single thing we did that required its use, so if you’re tackling this in your own garage with jackstands, you’ll be just fine.
The night before, we wrestled the monster ProCharger box into my car at the office, where it had sat awaiting its installation, so I could get the parts laid out and snap some of the individual detail photos ahead of time. The box barely fit into my car and there was even a moment where I was worried that we wouldn’t be able to close the door, but with the seat pulled all the way up, we managed to close the hatch and I was on my way. I headed home and set the parts out on the table, took some of the detail shots, gapped the Denso ITV24 spark plugs to .035-inch as suggested, then headed into the house with the installation manual to read it one last time.
With that said, let’s take a look at how two regular guys installed this ProCharger in one day onto a near-stock, daily-driven 2018 Mustang GT. I’ll touch on the high points, and at the end, we’ll hear from Mike on his impression of the install—and what he thinks of the system now that he’s had some time to cruise it.
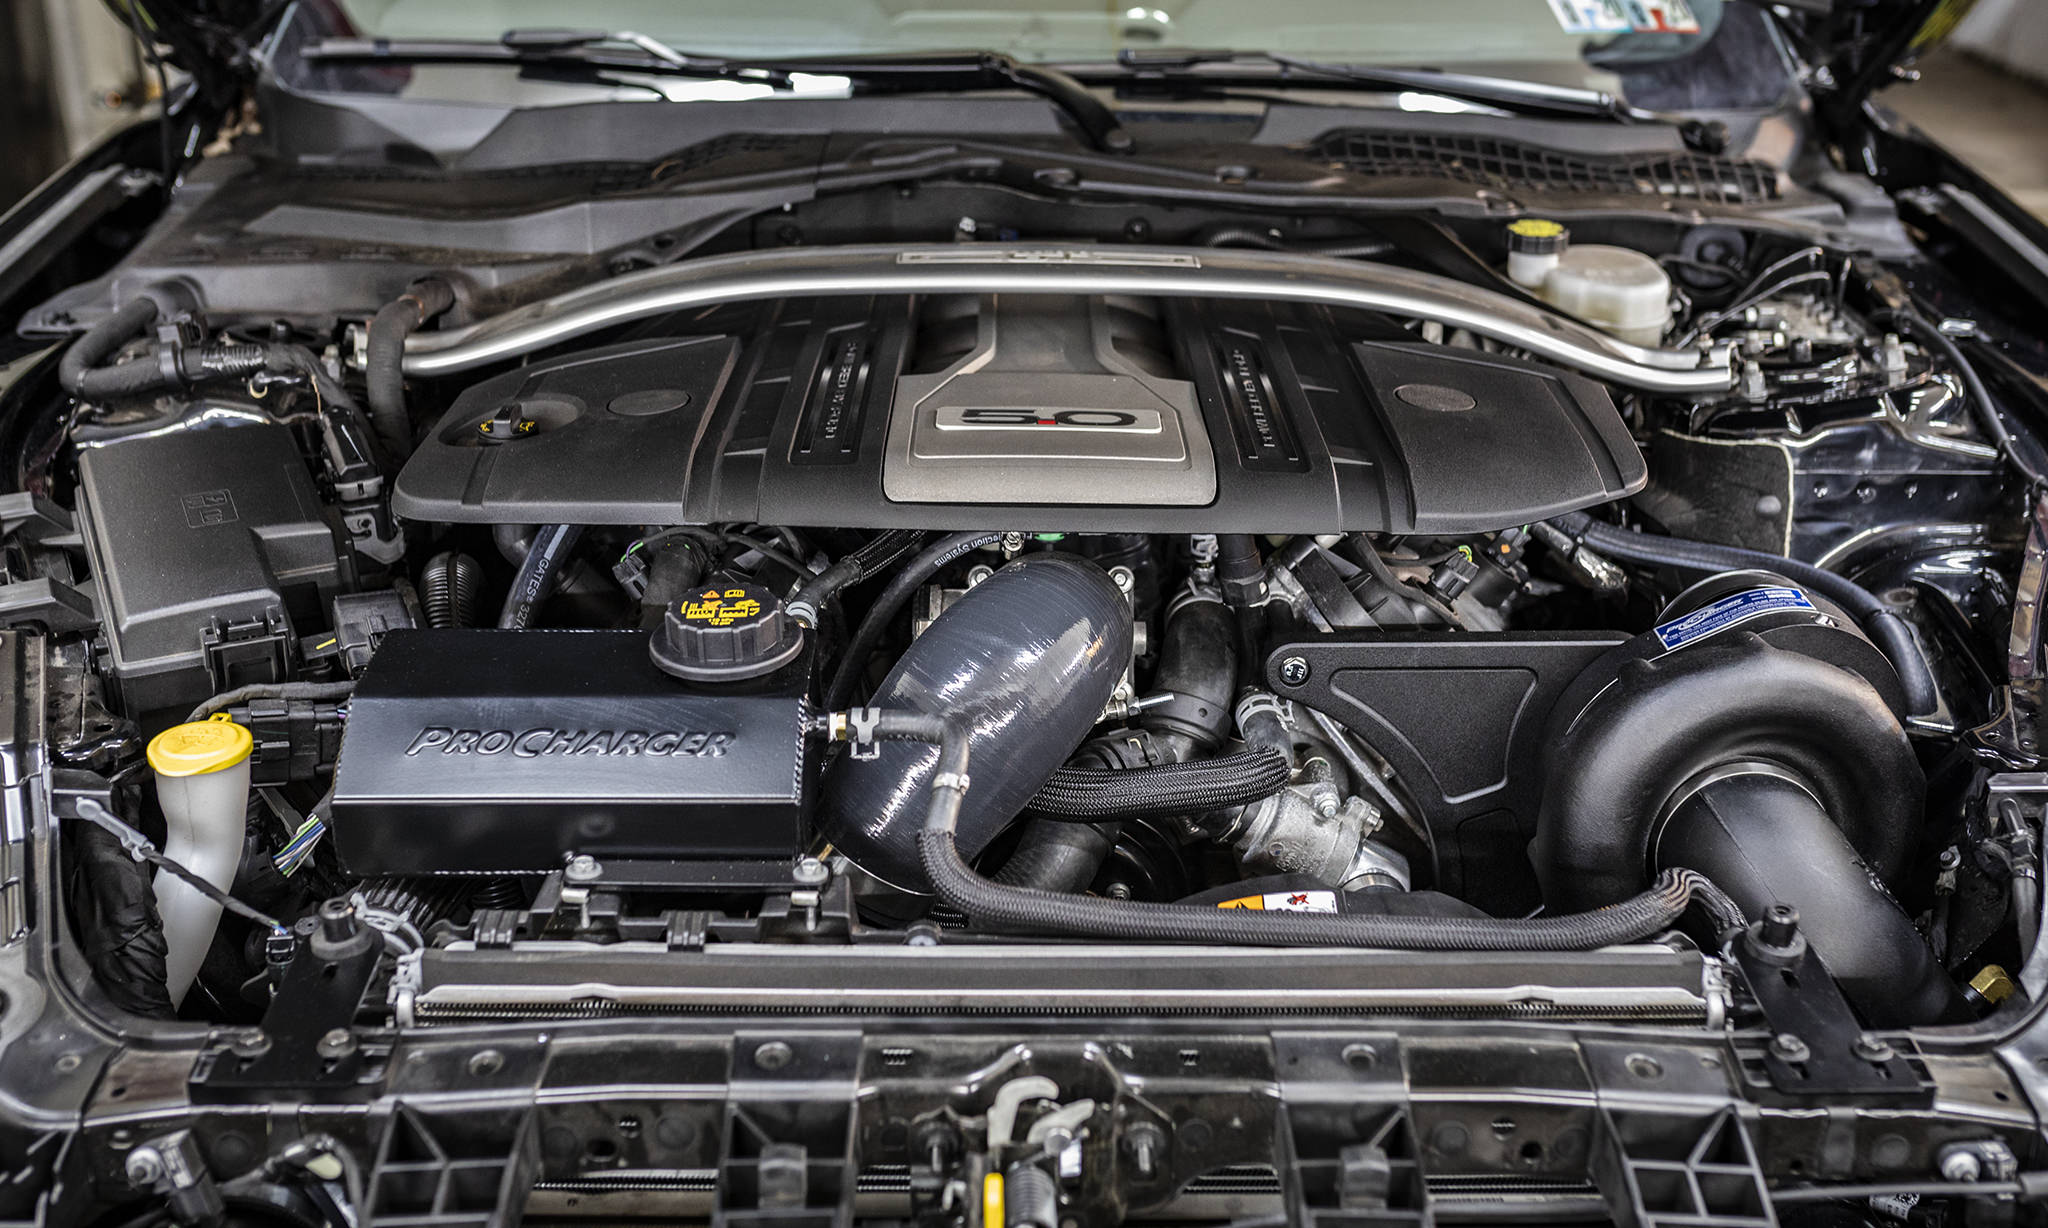
The P-1SC-1 kit is able to make substantial performance gains; ProCharger claims a 60-percent horsepower gain over the stock 460-horsepower engine. Mike also chose to step up to ProCharger’s Race Bypass Valve to get a little bit of that extra sound over the supplied unit. ProCharger supplied everything else we needed to do the install, with the exception of the 994 zip ties that I used out of my own stash. I’m kind of anal about little details, so I used a ton of them during the process to make sure that everything was neat and clean and organized. All of the zip ties face in the same direction, and I rotated all of the clasps out of view. Yeah, I’m that guy.
Moving on… we were starting with a virgin 2018 Mustang GT; at the beginning of the project, the only mods this car had were a Corsa Xtreme cat-back exhaust and a Barton short-throw shifter, along with a cold-air induction system from JLT Performance, which we removed to install the supercharger kit.
“My initial impression when receiving the ProCharger kit was how well it was packaged. Each of the items were individually bagged, labeled, and displayed on a full-colored instruction booklet which put my nerves at ease,” said Mike.
“My goal with this build was to be at or around 600WHP with the stage 1 kit, yet have the drivability feel as close to stock as possible.”
As someone who has installed a couple of supercharger systems, and many, many bolt-on Mustang parts over the years (I have plenty of grey hair in my beard, and very little hair on my head, so you can guess how old I am)… I’d like to note that I was impressed with how well the kit was laid out.
Taking off the front fascia was simple; there are several retaining screws underneath, then two major ones at each leading fender edge. We took some painter’s tape and applied it just above the disconnection point to make sure we didn’t scratch the paint on the way out.
Once we had the nose removed from the car, we had to remove the JLT cold-air kit, disconnect and remove several items like the air intake temperature sensor, and get the undertray removed to ease access. Here’s where the lift came in handy, though the process is certainly feasible on jackstands. We’re just lazy old men.
We drained the coolant into a drain pan, then set about reconfiguring the cooling system to gain clearance for the mounting bracket and compressor. ProCharger supplies a new lower thermostat housing, which redirects the coolant flow forward to gain clearance. We also removed the coolant reservoir, which gets replaced later.
The last item to handle before bolting on the bracket is to create a slight amount of clearance on the front of the cylinder head casting. The install manual shows you where to mark the cylinder head, and I used a Dremel with a cutting bit to grind away the aluminum and smooth out the edges. This makes clearance for the supercharger drive belt and allows ProCharger to keep the head unit as close to the engine as possible.
Installing the mounting bracket is as easy as 1-2-3-4 bolts, and you’re in business, with the bracket mounted to the front of the engine. ProCharger locates the bracket to make use of existing bolt holes and studs. We used just a small dab of medium-strength threadlocker; I suggested this based on the experience I’ve had with my own kit and the bracket bolts loosening up a hair over time.
Also, ProCharger suggests pre-installing the supercharger oil drain line, which is crucial especially in a car like Mike’s that is driven all the time. It makes supercharger oil changes substantially simpler.
A man and his baby.
The supercharger mounts with several Allen-head fasteners, but the process is straightforward. Once we had it mounted up, I immediately filled it with oil to prevent missing this critical step. ProCharger provides three bottles of oil with every unit, and there’s a 6,000-mile recommended change interval.
With the supercharger in place, we had to tackle all of the other tasks like moving the mass air flow sensor into the intercooler, relocating the radiator using the supplied brackets, and positioning the intercooler properly. Obviously, making sure it’s lined up and straight before locking down any of the hardware. The brackets provide some adjustment, which was helpful, but for the most part this was a plug-and-play operation.
The most time-consuming part of the entire day was fitting all of the hose couplers to the supercharger-side and engine-side pipes. They are delivered in long form and need to be trimmed to fit each specific installation. The key to a great-fitting kit is to take your time, adjust over and over again, and measure thrice before cutting. It probably took us two hours to get all of these pieces in place, but Mike would probably attribute that to me being a bit obsessive about the appearance and fitment. The last thing I wanted to have happen was for us to finish the install, then discover a preventable issue that would make us have to go back and fix it.
“Towards the home stretch of the install, I was waiting for that hiccup to occur that always happens with a project of this scale, but it never did. This shows that ProCharger thought of everything to help set up the installer for success,” said Mike.
The Denso ITV24 plugs we installed are two heat ranges colder than stock; what this means is that the plug design will be able to transfer the combustion heat into the cylinder head more rapidly, and helps to keep carbon buildup on the plug tip from occurring.
Here we thought it was going to be easy. What kind of parts install would this be without a sacrifice?
With the supercharger fitment locked down, we turned our attention to upgrading the fuel injectors to the new Injector Dynamics ID1000 units. The fuel system must be depressurized before you pull the rail, and there are two ways to do this. We pulled underhood fuse #49, but you can also lift the back seat and unplug the pump. Either way, after disabling the system it’s wise to crank the car for 15 seconds or so to get the excess fuel out of the rails. When you pop the injectors loose from the manifold, be prepared to have some leftover fuel dripping and have some rags handy for cleanup. Since these injectors are plug-and-play units, there isn’t much difficulty to the install. Dab a bit of silicone lubricant on the O-rings, and they pop right into place. Re-seat the injectors into the manifold, tighten down the mounting bolts, and hook the fuel lines back up.
The last few steps of the install included building the vacuum tree, mounting the bypass valve and routing the hose to it, installing the supercharger inlet pipe, and dropping the new coolant tank into place. This is where we ran into the only real issue we had with the installation, but it was easily remedied. As the inlet pipe is manufactured from plastic, the inner diameter was molded just a bit too tight, and the pipe didn’t want to slide onto the supercharger inlet. I whipped out the Dremel and sanded it down in a circular motion to open up the ID, then popped it into place and locked down the clamp.
I’m not sure whether this was just an issue with our kit or not, but if you run into this, the best advice I could give is to take your time. Remove small amounts of material from the entire inner circumference of the tube and test-fit multiple times until you get it right, rather than going crazy and removing too much at one time.
Wrapping up the install was simple; we refilled the coolant, reinstalled the nose of the car, and checked over all of our connections to make sure that everything was secure. While I was doing this, Mike loaded the tune into the car. One push of the go button, and the car fired right up. I closed the hood, and Mike headed out to go home. From start to finish, including lunch break and photography, it took us about 11 hours over one Saturday to complete the whole install.
Mike sums up the whole project simply: “Although the car has not been on the dyno yet, it feels every bit of 600 wheel horsepower. The power comes in smooth and continues to build throughout the RPM band. Drivability was spot-on after only a few tuning revisions with Rob Shoemaker at Palm Beach Dyno. The car truly drives the same way it did the day I pulled away from the dealership. I couldn’t be happier with the ease of the install and the power the car produces.”