


Rust. That nasty reddish-brown compound – otherwise known as iron oxide – which occurs when iron or an alloy that contains iron, like steel, is exposed to oxygen and moisture for a long period of time. Over time, the oxygen combines with the metal, forming an electro-chemical reaction between iron and oxygen which forms into iron oxide – the metal’s worst enemy. To auto enthusiasts, rust can spell disaster and can be a signal of the impending death of a vehicle. Rust can quickly spread like cancer if not addressed quickly or properly.
Eliminating rust off metal can be a daunting task, but it is not impossible. There are several ways to attack rust using common household cleaning tools and products that you probably already own. We’re going to show you some tricks of the trade that may just save that component you had earmarked for the junk pile.
What you need:
- A large plastic container or any type of non-conductive container
- Battery charger – a suitable charger that is able to produce a minimum of 6 to 10 volts DC
- Conductive electrodes. Metal rods for smaller sized jobs, but we suggest a large sheet of metal to speed up the process
- Arm and Hammer laundry soda, also referred to as washing soda
- Wire and/or cables for connecting electrodes
- Distilled water
- Small length of wire to suspend the rusted part into the solution
- Rubber gloves and safety glasses – safety first!
Parts Preparation And Rust Removal Procedure
Depending on the type of metal surface you are trying to clean, you may want to use a wool pad, steel wool, or a wire brush to get rid of rust buildup. Simply scrub or scrape the loose rust until all of the buildup is gone. The most important thing is to remove any dirt, oil and grease that might affect the electrolysis process.
Electrolysis is the least destructive and most thorough method available to remove oxidation. Electrolysis does not require abrasive grinders, wire wheels, or scrapers, and when done properly can remove rust and oxidation effectively from anything made of steel, cast iron, or wrought iron.
What is electrolysis?
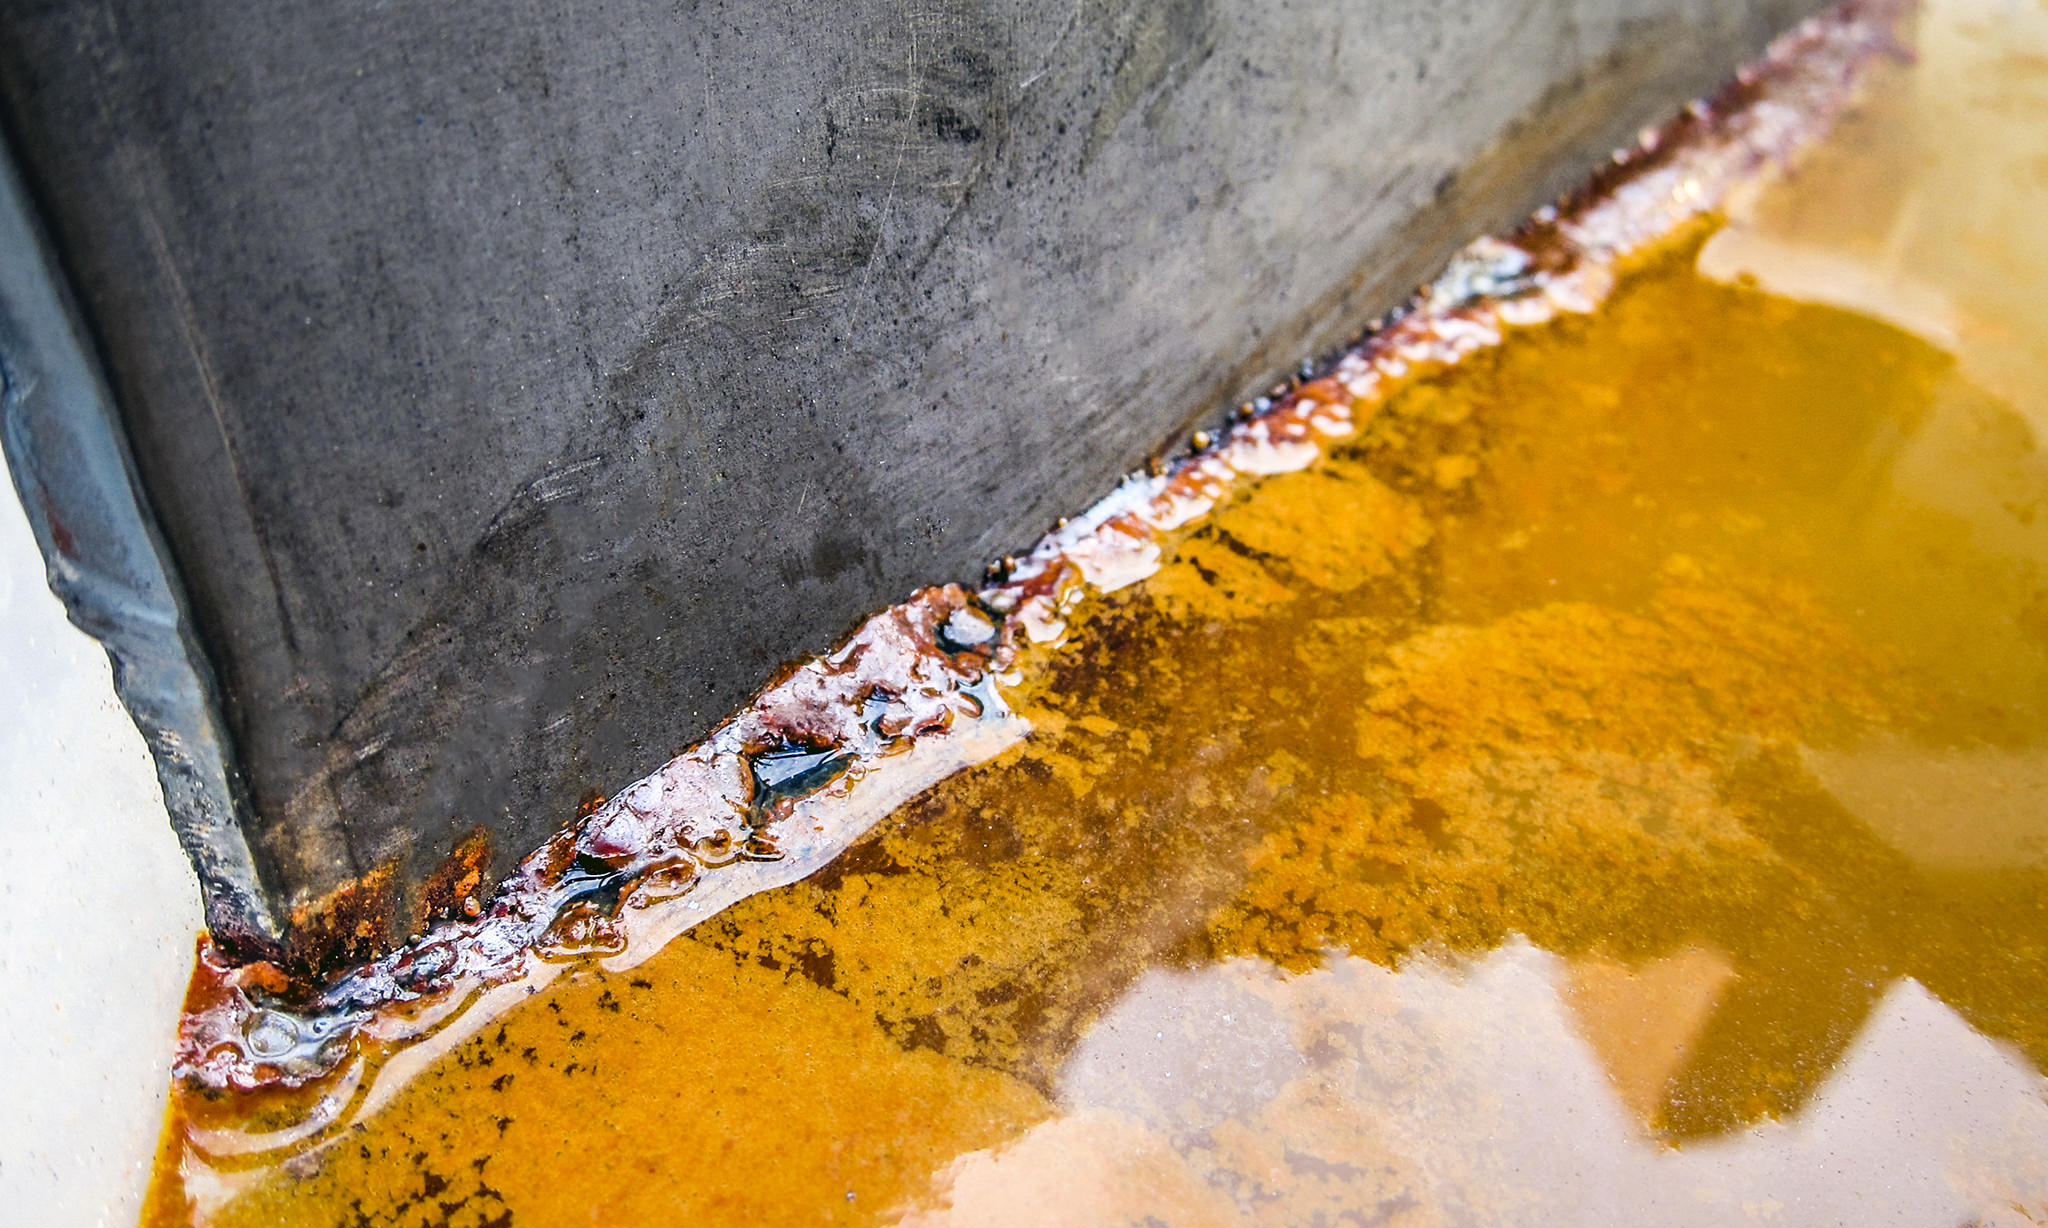
Electrolysis is a technique for returning surface rust to iron by using electricity to break down water into hydrogen and oxygen. The electrolytic method – also known as electrolysis – involves using the passage of an electric current through an alkaline solution, or electrolyte, to do the job of converting some of the corrosion products into a more stable form, while breaking down the remaining corrosion by converting it into a loosely bound, easily removed deposit. To test the electrolysis process, we used some remaining scrap pieces from our project Datsun 510 body panel. With over 40 years of rust and corrosion on these panels, this will be a true test of the rust removal process.
Begin the process by using a plastic, non-conductive container to hold your liquid solution. Any shape or sized container deep enough to hold enough water to cover your rusty item will do.
Add water to your container. We suggest using distilled water instead of tap water, as tap water has additional elements that can affect the overall electrolysis process. Add approximately one tablespoon of washing soda per gallon of water to your container. Washing soda is readily available at your local grocery store and can be found in the household cleaning section. When mixed together, the electrolyte solution will become murky white but will quickly clear up once the washing soda has fully dissolved. Always wear safety gloves and glasses when working with any electrolysis bath.
Place the electrodes in the container and set them up to ensure they’re held in place around the perimeter of the inside of the bucket or container, so that they cannot move or touch the part to be cleaned, which will be placed in center of the container.
Connect the electrodes together with wire or cables. We used a coilover spanner wrench and a bolt as our electrode and tied them together with a piece of wire. This will become what is known as the anode in the rust removal process.
Suspend the part to be cleaned into the bucket so it hangs in the middle. We used a piece of wood and hung a piece of wire attached to our rusted metal piece. The part to clean is the cathode. The anode and cathode should never come in contact with one another as it will cause an electrical short.
Attach both leads to your battery charger. Use a suitable charger that is able to produce a steady current of 6 to 10 volts DC at 2 amps or larger. Place the negative lead (black) on the piece that is to be cleaned. Attach the negative lead (red) to the electrode, in our case, the spanner wrench and bolt. Placing the terminals incorrectly will cause the electrolysis to literally eat (dissolve) your part.
We fired up the charger and within seconds, were able to witness small bubbles rising from the part suspended in the mixture. We highly suggest you perform the electrolysis process in a well-ventilated area as hydrogen and oxygen is being expelled from the tiny bubbles; this combination of gases can be explosive if a spark were to occur.
Learning Process
After running the electrolysis process for over 30 minutes, we were disappointed that minimal rust was removed from the surface of our test panel. Upon further analysis, we came to the conclusion that our electrode pieces were too small for the electrolysis reaction to work effectively. We quickly pulled out the big guns and replaced them with a quarter-inch-thick sheet of steel.
We once again fired up the charger and sat there in awe as the water quickly turned brownish/orange in hue as the rust began lifting and began to collect onto the electrode. How long should you run the electrolysis process? The required time depends on the size of the object and the amount of rust. Typical cleaning time for moderately rusted objects is a few hours. Heavily rusted objects can be left over night.
Depending on the size of the electrode, it might require cleaning from time to time. We pulled our steel sheet and cleaned the gunk off using a wooden stick and placed it back in the solution to continue the process. In less than three hours, we pulled our metal piece to begin the final cleaning process.
Final Prep
Upon removing the part or parts from the electrolysis bath, we used a copper wire brush to scrub the surface clean, then rinsed it with cold water. If additional rust is left behind, repeat the process. Once the process has been completed to your satisfaction, immediately dry the part to prevent rust from resurfacing.
We applied a water-based rust preventative liquid called Dry Coat from Metal Rescue. Once applied, the clear protective coating will dry-to-touch within 30 minutes at ambient conditions. It does not attract dirt or dust on metal parts and does not leave behind any oily residue.
By now, you have noticed the processed piece exhibits areas that are black in color. An electrical current running through a solution of water and electrolyte will convert red rust into black rust (black oxide). Black oxide is defined as good for any metal surface and is a stable compound that doesn’t want to react with oxygen any longer like red rust does.
The final step is to use an etching primer designed to prevent rust from coming back in the future. And the best part of the electrolysis process? Because the electrolyte solution isn’t considered toxic and is full of iron, it’s said to be an excellent fertilizer for your lawn!